|
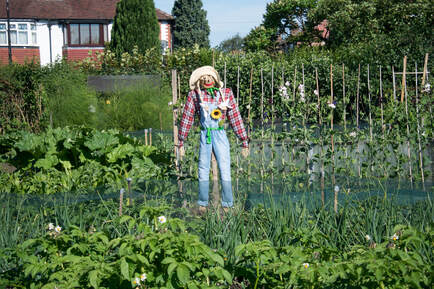
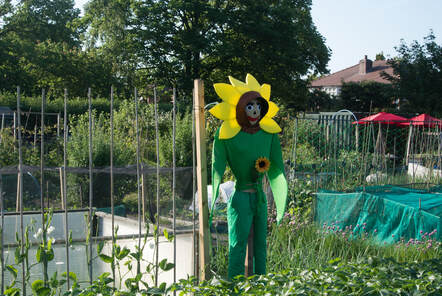
Have you ever wanted to make a scarecrow but didn’t know how? I used this site for simple step-by-step instructions.
http://www.wikihow.com/Make-a-Scarecrow Scarecrows not only scare the birds away but they are great fun to make and they don’t cost much to do. So involve your children and grandchildren and have fun. Bubble wrap and plastic bags make a great stuffing and use old clothes or visit the charity shops to dress your scarecrow. Safety pins are also great for securing the clothes.
0 Comments
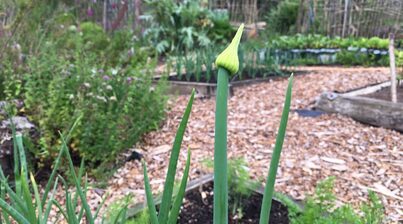
There's nothing worse than going to your allotment and finding that your onions and shallots have bolted. But it's not the end of the world; you can still harvest a good crop.
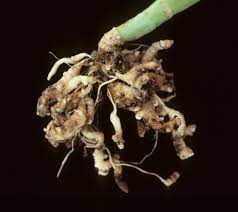
Why do onions bolt? Onions, shallots and garlic are all part of the Allium family, a plant that naturally flowers once every two years. But flowering (or bolting) isn't such a great thing when you're trying to grow lots of good-quality bulbs to eat. Usually, given normal summer weather conditions, it's easy to grow a good crop of onions, shallots or garlic without them bolting before they reach maturity. But if the spring and summer weather is exceptionally wet and chilly, it encourages onions all over the country to bolt early. All's not lost though! Despite the fact they've bolted, you can still use them and they still taste great, they just don't store as well as fully mature onions. What to do when your onions or shallots bolt? As soon as you see them develop flower heads you should either snip off the flower at the top of the stalk or, if the stalk is quite thick, snip the whole thing off about 1 inch above the bulb (but not the leaves). Doing this stops the plant from wasting energy on making seeds. Once you've snipped the flowers off they can be left in the ground or harvested. Those that are left in the ground won’t f an onion has bolted it's not necessary to wait until the foliage turns brown before you harvest them, in fact leaving them that long could cause them to start to rot or become woody. If some of your onions or shallots have bolted but others haven't, always use the bolted ones first. The un-bolted bulbs have a good chance of going on to reach maturity and can be harvested later. Once you've harvested your onion or shallot bulbs that have bolted, don't worry about drying them out as they won't store very well anyway. They'll keep for a week or so in the cupboard, but it's best to use them straight away while they're fresh. If there are too many, they can be chopped and frozen to be used in future recipes. How to avoid bolting onions in future The best thing you can do to avoid bolting is to plant 'heat treated' onion sets. Heat-treated onion sets include Hytech, Hyred, Fen Early, Red Fen and Rumba, and are available to buy between autumn and spring. These onion sets can be planted in the autumn for an early summer harvest, or stored and planted during spring for a later summer harvest. There are also lots of varieties available with good resistance to bolting. These include Onion Troy, Onion Stuttgarter Stanfield, Onion Autumn Gold, Onion Sturon, Shallot Zebrune, Shallot Biztro, Shallot Yellow Moon and Shallot Picasso - many of which are available to buy as seeds and sets throughout autumn and spring. Club root is a major problem that affects brassicas and unfortunately many plots on our site suffer from it. It is usually an inherited problem, possibly due to the cultivation techniques of previous tenants over the years. The bad news is that it is a slime mould that can survive as resting spores in the soil for up to 20 years. So if you have it, chances are you will never be rid of it because there are no chemicals to control it.
The 3 main contributors to club root are:
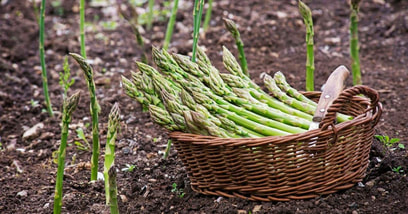
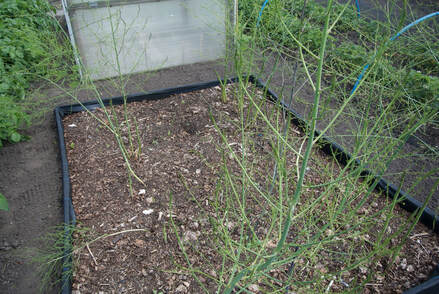
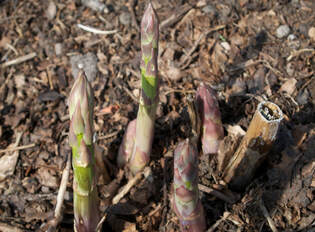
Brassicas are lime lovers and need a very limey soil with a pH of at least 7.5. So spread plenty of lime on your brassica patch. Chances are that you will not raise the pH in one growing season, but it can be achieved over several seasons. Digging in manure or garden compost will also help. Do rotate your crops every season. It helps to reduce the risk of spreading soil borne pests and diseases around the allotment site. Make sure your soil is well drained. You could do this by earthing up the soil to allow water to drain. You could also consider making a clean start by using raised beds filled with fresh, clean soil. Don’t accept gifts of brassicas that may already be infected with club root. Even a small amount of soil falling onto your plot from the roots can infect your soil. Club root can also be spread from soil on your boots, which is a good reason for not walking onto your neighbour’s soil and not allowing them to walk onto yours. Be courteous and stick to the paths. The last bit of good advice is to buy seeds that are club root resistant as these produce good brassicas even on infected soils. You may find that the roots will still be distorted but the plants are definitely good to eat. Good examples are: Sprouts – Crispus F1 Cauliflower – Clapton Cabbage – Kilaxy or Kilaton Asparagus is a perennial vegetable with a delicious flavour. It is good for growing on plots where it will not be disturbed. It loves sun and well-drained soil, but needs some protection from the wind. It takes 3 years before the first harvest so you need to be patient. I started my crop in autumn with 21 crowns. The varieties I chose were Ariane, Pacific 2000 and Pacific Purple. September Year 1 - Soil Preparation Asparagus can produce spears for more than 20 years, so it's worthwhile spending time on preparing the bed. I first dug down a couple of feet and placed a frame at the top. Then I lined the pit with Mypex which wasn’t strictly necessary but I had inherited a plot with bindweed and wanted to make sure that I got it all out and then limited it’s regrowth. I then part filled in the pit, mixing in plenty of well-rotted manure. A week before planting I scattered some Growmore over the area and then forked it in before raking the ground level. October Year 1 – Planting the Crowns It took me about two hours to plant 21 crowns. I first marked three straight rows, 30cm wide by 30cm apart and then poured soil down the length of the rows to make 10cm high mounds. I placed the asparagus crowns 30cm apart, 7 to a row, on top of the mound, spreading the roots out either side of the plant and then sifted about 10cm of soil over them. I did this again as the stems grew until I had completely filled the pit by the end of autumn. Years 2 - 3 – Waiting and Caring There was not much else to do for the next two years except to wait, weed, give them a feed of Growmore in the spring and water them during dry weather. When the spears appeared I didn’t harvest them so that I wouldn’t weaken the crowns. Instead I left them to grow into lots of ferny foliage. To protect them from the wind, I used stakes and string to make a fence for support. When the plants turned yellow in autumn, I cut down the stems leaving 5cm above the ground. I covered the crowns with leaf mould in winter to protect them. We lost 3 crowns after the first winter, all Pacific Purple. April Year 4 - Harvesting
At last in late April, when the spears were about 12cm long we removed them with a serrated knife, cutting them off just beneath the soil. They just needed a quick steam or a griddle on the BBQ and some butter. They were beautiful, absolutely worth the wait! We stopped harvesting after 6 weeks to allow the plants to build up energy for next year, and gave the plants an extra boost by feeding with Growmore. Next and subsequent years, we harvested for 8 weeks. |
AuthorPlot holders cogitate and ruminate about allotment life. Archives
May 2022
Categories |
Copyright - Walton Road Allotment Society © 2023


