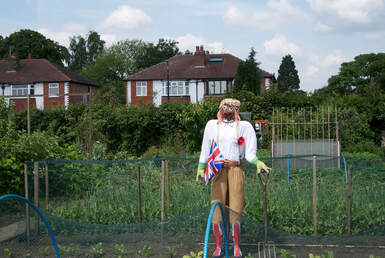
 Have you ever wanted to make a scarecrow but didn’t know how? I used this site for simple step-by-step instructions. http://www.wikihow.com/Make-a-Scarecrow Scarecrows not only scare the birds away but they are great fun to make and they don’t cost much to do. So involve your children and grandchildren and have fun. Bubble wrap and plastic bags make a great stuffing and use old clothes or visit the charity shops to dress your scarecrow. Safety pins are also great for securing the clothes. 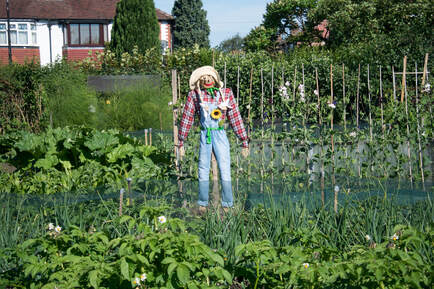 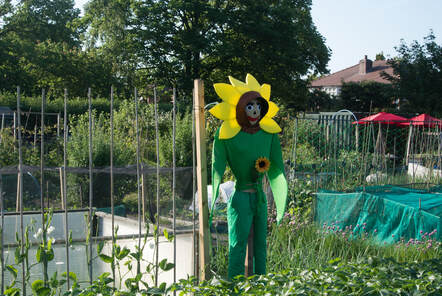
0 Comments
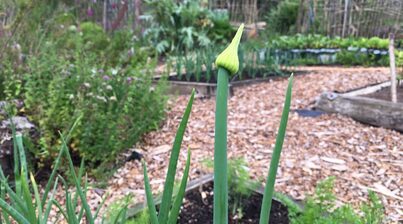 There's nothing worse than going to your allotment and finding that your onions and shallots have bolted. But it's not the end of the world; you can still harvest a good crop.
Why do onions bolt? Onions, shallots and garlic are all part of the Allium family, a plant that naturally flowers once every two years. But flowering (or bolting) isn't such a great thing when you're trying to grow lots of good-quality bulbs to eat. Usually, given normal summer weather conditions, it's easy to grow a good crop of onions, shallots or garlic without them bolting before they reach maturity. But if the spring and summer weather is exceptionally wet and chilly, it encourages onions all over the country to bolt early. All's not lost though! Despite the fact they've bolted, you can still use them and they still taste great, they just don't store as well as fully mature onions. What to do when your onions or shallots bolt? As soon as you see them develop flower heads you should either snip off the flower at the top of the stalk or, if the stalk is quite thick, snip the whole thing off about 1 inch above the bulb (but not the leaves). Doing this stops the plant from wasting energy on making seeds. Once you've snipped the flowers off they can be left in the ground or harvested. Those that are left in the ground won’t f an onion has bolted it's not necessary to wait until the foliage turns brown before you harvest them, in fact leaving them that long could cause them to start to rot or become woody. If some of your onions or shallots have bolted but others haven't, always use the bolted ones first. The un-bolted bulbs have a good chance of going on to reach maturity and can be harvested later. Once you've harvested your onion or shallot bulbs that have bolted, don't worry about drying them out as they won't store very well anyway. They'll keep for a week or so in the cupboard, but it's best to use them straight away while they're fresh. If there are too many, they can be chopped and frozen to be used in future recipes. How to avoid bolting onions in future The best thing you can do to avoid bolting is to plant 'heat treated' onion sets. Heat-treated onion sets include Hytech, Hyred, Fen Early, Red Fen and Rumba, and are available to buy between autumn and spring. These onion sets can be planted in the autumn for an early summer harvest, or stored and planted during spring for a later summer harvest. There are also lots of varieties available with good resistance to bolting. These include Onion Troy, Onion Stuttgarter Stanfield, Onion Autumn Gold, Onion Sturon, Shallot Zebrune, Shallot Biztro, Shallot Yellow Moon and Shallot Picasso - many of which are available to buy as seeds and sets throughout autumn and spring. 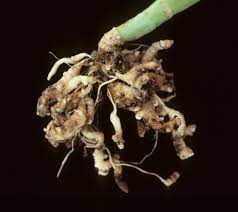 Club root is a major problem that affects brassicas and unfortunately many plots on our site suffer from it. It is usually an inherited problem, possibly due to the cultivation techniques of previous tenants over the years. The bad news is that it is a slime mould that can survive as resting spores in the soil for up to 20 years. So if you have it, chances are you will never be rid of it because there are no chemicals to control it.
The 3 main contributors to club root are:
Brassicas are lime lovers and need a very limey soil with a pH of at least 7.5. So spread plenty of lime on your brassica patch. Chances are that you will not raise the pH in one growing season, but it can be achieved over several seasons. Digging in manure or garden compost will also help. Do rotate your crops every season. It helps to reduce the risk of spreading soil borne pests and diseases around the allotment site. Make sure your soil is well drained. You could do this by earthing up the soil to allow water to drain. You could also consider making a clean start by using raised beds filled with fresh, clean soil. Don’t accept gifts of brassicas that may already be infected with club root. Even a small amount of soil falling onto your plot from the roots can infect your soil. Club root can also be spread from soil on your boots, which is a good reason for not walking onto your neighbour’s soil and not allowing them to walk onto yours. Be courteous and stick to the paths. The last bit of good advice is to buy seeds that are club root resistant as these produce good brassicas even on infected soils. You may find that the roots will still be distorted but the plants are definitely good to eat. Good examples are: Sprouts – Crispus F1 Cauliflower – Clapton Cabbage – Kilaxy or Kilaton 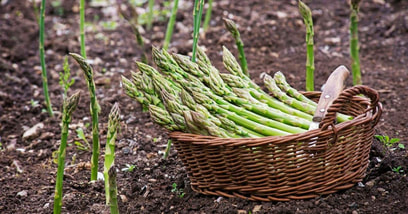 Asparagus is a perennial vegetable with a delicious flavour. It is good for growing on plots where it will not be disturbed. It loves sun and well-drained soil, but needs some protection from the wind. It takes 3 years before the first harvest so you need to be patient. I started my crop in autumn with 21 crowns. The varieties I chose were Ariane, Pacific 2000 and Pacific Purple. September Year 1 - Soil Preparation Asparagus can produce spears for more than 20 years, so it's worthwhile spending time on preparing the bed. I first dug down a couple of feet and placed a frame at the top. Then I lined the pit with Mypex which wasn’t strictly necessary but I had inherited a plot with bindweed and wanted to make sure that I got it all out and then limited it’s regrowth. I then part filled in the pit, mixing in plenty of well-rotted manure. A week before planting I scattered some Growmore over the area and then forked it in before raking the ground level. October Year 1 – Planting the Crowns It took me about two hours to plant 21 crowns. I first marked three straight rows, 30cm wide by 30cm apart and then poured soil down the length of the rows to make 10cm high mounds. I placed the asparagus crowns 30cm apart, 7 to a row, on top of the mound, spreading the roots out either side of the plant and then sifted about 10cm of soil over them. I did this again as the stems grew until I had completely filled the pit by the end of autumn. Years 2 - 3 – Waiting and Caring There was not much else to do for the next two years except to wait, weed, give them a feed of Growmore in the spring and water them during dry weather. When the spears appeared I didn’t harvest them so that I wouldn’t weaken the crowns. Instead I left them to grow into lots of ferny foliage. To protect them from the wind, I used stakes and string to make a fence for support. When the plants turned yellow in autumn, I cut down the stems leaving 5cm above the ground. I covered the crowns with leaf mould in winter to protect them. We lost 3 crowns after the first winter, all Pacific Purple.  April Year 4 - Harvesting At last in late April, when the spears were about 12cm long we removed them with a serrated knife, cutting them off just beneath the soil. They just needed a quick steam or a griddle on the BBQ and some butter. They were beautiful, absolutely worth the wait! We stopped harvesting after 6 weeks to allow the plants to build up energy for next year, and gave the plants an extra boost by feeding with Growmore. Next and subsequent years, we harvested for 8 weeks. 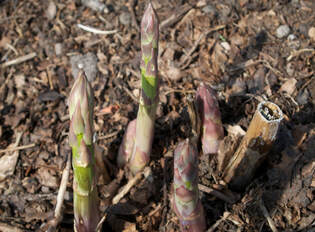 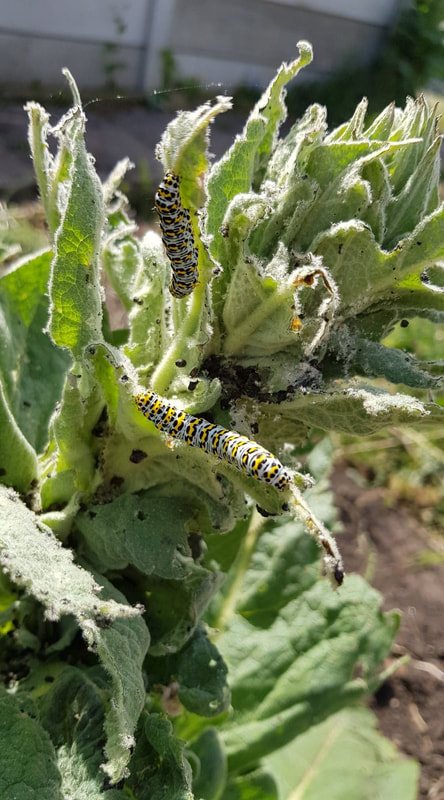 It's amazing what you may find when clearing a plot. These Mullein Moth caterpillars were found when we were clearing Plot 19. The caterpillars are brightly coloured, unlike the adult moth which is a dull brown colour and easily missed on brown foliage. 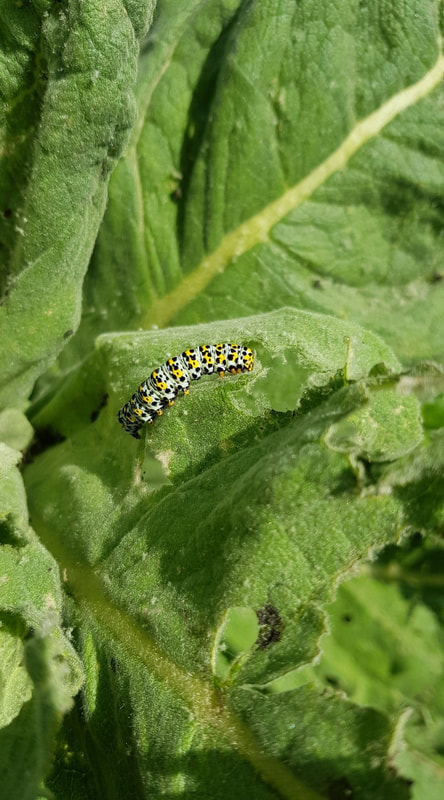 We left the catterpilars alone so that they have a chance to eventually hatch. The female lays batches of eggs between May and July on species of Verbascum and cultivated Buddleia plants. 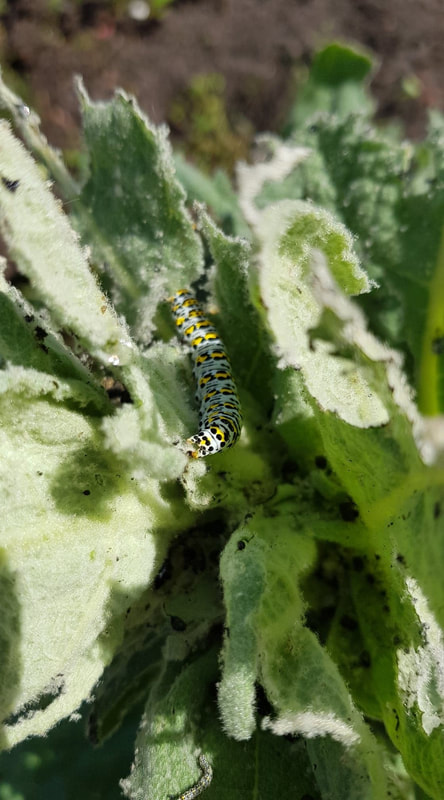 If you would like some more information on the moths there are a couple of sites here:
https://en.wikipedia.org/wiki/Mullein_moth http://www.wildlifeinsight.com/british-moths/the-mullein-moth-and-caterpillar/ 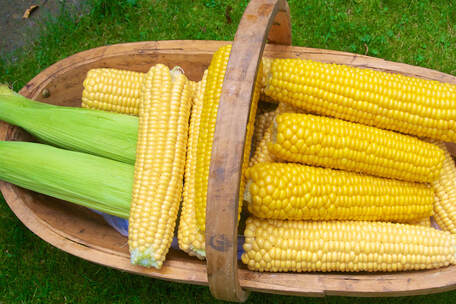 If you have planted sweetcorn for the first time, you may wonder how to look after it and how to tell if it is ready to harvest. Here are some handy tips. You should have planted your corn in blocks, rather than rows. This is essential for proper pollination. Once your corn has started to grow and produce fronds, you are well on track for a healthy crop. 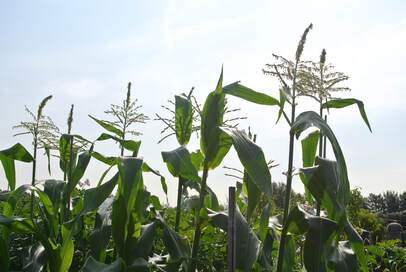 You can feed the corn once it is established. Just throw some Growmore or equivalent general fertiliser on and water in if it doesn't look like rain. As the corn ripens, The fronds at the top of the cobs will turn from golden to brown and then a deep chocolate brown. The fronds as seen on the picture below have just started to turn. Wait until they are fully chocolate brown before you do the next test. 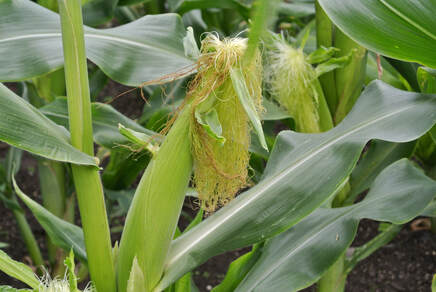 When you think the corn may be ready, usually around early to mid September, carefully strip back the leaves of one of the corn cobs a few inches (whilst it is still on the plant). The kernels should be fully formed up to the top of the plant and look nice and plump. Now stick your nail into one of the kernels. If the juice runs clear, they are not ready. If the juice is milky, they are ready to harvest. 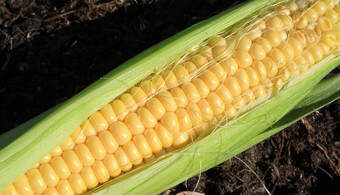 When the corn is ready and harvested, make sure that you eat it or freeze it straight away. The longer it is left off the plant the more taste you lose. I know people who put their pan on to boil before they go to the allotment, pick the corn and go straight home to cook it. Far and away the best thing to do. But don't get chatting and leave your pan to boil dry:-)
Freezing is simple; just strip the leaves and fronds from the corn, blanch the cobs for a few minutes and then either freeze them whole or strip the corn off the cob with a sharp knife and freeze the kernels. This is a handy way to add a handful to salads and stir fries at a later date. 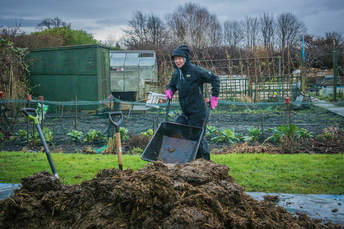 Donty Mon Do you like to forget your plot in winter or do you like to prepare for next spring? Here are some jobs that can be done on those cold, crisp mornings in winter. Order and prepare manure You can order manure now or up to the end of February. If you lay some cardboard on the soil first it will rot down with the manure. If you leave the manure on the surface, it will protect the soil below from the harshness of the winter. If you want to spread some around early, decide where your potatoes are going and dig some into that area. The winter frost will break down the soil making it perfect to plant your potatoes in the spring. Stack the rest and cover it for the rest of the winter. The cover will protect the manure and help it break down. 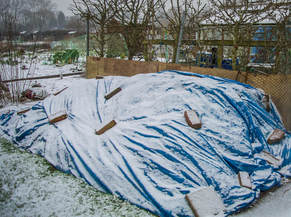 Make sure you don't spread manure where you will plant root vegetables. They won't do well in freshly manured ground. Brassicas also don't do well in freshly manured soil; they need soil with a good coating of lime. You can do this in late winter or the spring.
Make a runner bean trench If you are planning to grow beans, the manure will improve the structure of the soil. Try making a runner bean trench. You can fill it with kitchen scraps, compost, manure and old plants. This will rot down nicely and help to retain moisture for your beans. Overwinter onions, garlic and broad beans Some plot holders don't grow much over the winter, but overwintering veg can make good use of empty space and they will be harvested before you need the ground in spring. You can put the veg in the ground as late as the end of November so now is the time to think about doing it. Harvest your existing veg Kale is usually cut and come again so you can harvest it regularly and it will keep growing. Leeks will sit happily in the ground until you need them. Sprouts usually do well after they have been exposed to frost making them perfect for your Christmas dinner. Otherwise, relax and enjoy a break before the fun starts again next year. 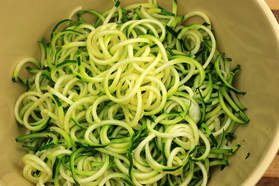 Jean Price
Everyone is saying a spiralizer is set to be the new, must-have kitchen gadget. I bought one recently from Lakeland. But what does it do and what vegetables can you spiralize? Most models available work in a similar way. All you do is attach raw fruit or vegetables to the ‘teeth’, then turn the handle to push the vegetable through a choice of blades to create vegetables ribbons, or noodles in a variety of thicknesses. There are a few vegetables that spiralized brilliantly, including root vegetables like carrots and swede but also courgettes, cucumbers, squash or pumpkin, or firm fruits such as apples and pears.'' Courgette All plot holders scratch their heads trying to find new things to do with spare courgettes. Forget spaghetti, this year it’s all about ‘courgetti.’ Use the thin noodle attachment on the spiralizer to create long twirls of pasta-like vegetable noodles. Simply boil the spiralised courgette for 20 seconds, then top with ingredients of your choice (see my new recipe for courgetti with mushrooms). Other fruits and vegetable ideas from BBC Good Food: Carrots Raw carrot ribbons, made with the slicing blade, add texture and crunch to a salad or slaw. Or, you can stir-fry the carrot ribbons for a couple of minutes with garlic and coconut oil for a healthy side dish. Sweet potato Use the thicker noodle blade to create sweet potato curly fries, toss in a little oil and bake until crisp. Apples Coleslaw will never be the same again, add texture with apple noodles; just make sure you toss in lemon juice as soon as the apple noodles come out of the spiralizer to prevent them from browning. To cook or not to cook? Naturally, cooking your courgetti is a much speedier process than boiling bags of weighty pasta: ''Most spiralized vegetables can be eaten raw or cooked. Some vegetables, such as aubergine, can break up when cooked, but most will hold their shape if gently boiled or stir-fried. If you're looking to cut back on carbs, pack in the fruit and veg and maintain a healthy weight this gadget could transform how you cook. The difference between 100g of pasta and 100g of courgette is about 300kcal and the cooking time is considerably less.
Jean Price - Plot 4
It's always great to hear about our members activities outside of the allotment and Anne Earnshaw (plot 16a) and Debbie Bedford (plot 6b) both contacted me this week to tell me about activities that they are involved in. You may be interested to hold the dates: Ann Earnshaw - Sale Arts Trail, Artist Takeover: To those of you who enjoyed the Sale Arts Trail these last 3 years and came to our home, we thought you would like to know what is happening this year. The Arts trail itself is now a bi-annual event and there will be no "trail" this year but there is an exhibition called "Artist Takeover" which will be held at the Waterside Arts Centre in Sale on Sunday 11th June from 10:30 - 5pm. I will be selling my cards, mounted images and framed work . This year I have put my images on quality art canvas and glass. They look beautiful . If you can't come on Sunday you can view my work at home, Carnforth Drive Sale call 07891 605 215 I am also at the following venues this year: Alderley Edge Cricket Club Summer Fete with 'Simply Cheshire' Sunday July 2nd 1pm - 5pm Moss Lane Alderley Edge, SK9 7HN Wilmslow Art Trail 13th , 14 th and 15 th October My new website is: www.anneearnshawart.com Debbie Bedford:- National Garden Scheme: I am opening the garden for the N.G.S. On Sun.16th July (praying it will be dry) It will be open from 1-5pm at 34 Stanley Mount, M33 4AF. I should be getting some posters soon so I will put them up on the notice board. This is a late 'pop-up'opening and I need to generate as much publicity as I can, so pass the word around to your friends. All welcome. There will be teas and home-made cakes. Admission is £3 for adults and children go free. (Sorry, no dogs) See more on the National Garden Scheme here: https://www.ngs.org.uk  Paul Price - Plot 4
Do you ever get confused over what to sow where and when? Crop rotation, once you get the hang of it is pretty straightforward. All you need to remember is what veg belongs in what group and then where you grew them last year. Most people do a 3 year rotation with 5 different plant groups. The more ambitious use a 4 year plan, but let's keep this blog to 3 years. The RHS has a good guide and here is a section from it: How to do crop rotation Divide your vegetable garden or allotment into sections of equal size (depending on how much of each crop you want to grow), plus an extra section for perennial crops, such as rhubarb and asparagus. Group your crops as below:
Year one Section one: Potatoes Section two: Legumes, onions and roots Section three: Brassicas Year two Section one: Legumes, onions and roots Section two: Brassicas Section three: Potatoes Year three Section one: Brassicas Section two: Potatoes Section three: Legumes, onions and roots You can read the full article here: https://www.rhs.org.uk/advice/profile?PID=124 |

|
Walton Wanderings Blogspot |


Copyright - Walton Road Allotment Society © 2023