 Jean Price - Plot 4
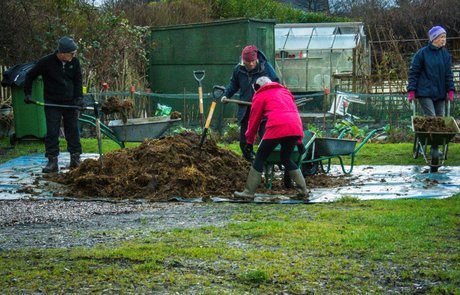
Well, it’s getting to the end of January and it is very cold with frosty mornings and hard soil. So, its a good time to be thinking about the condition that our soil is in. The secret of a successful harvest is getting the soil in the best condition you can. One of the best ways of conditioning the soil is introducing organic matter in the form of animal manure, which adds nitrogen, garden compost, which adds slow release nutrients and leaf mould which improves drainage. I know a lot of you have thought about improving your soil already because of the working parties that we have organized this month to help shovel the deliveries of manure that we have had (with more to come). Organic matter will never fail to improve the structure of the soil and help with water drainage. We have a good supply of leaf mould which is free for our society members and I know that many of you compost waste products too. A sprinkling of chicken pellets help to give a big boost to the soil microbes. It smells a bit rich but it’s worth it. It’s easy to enrich your soil; just pile the organic matter on the soil and then fork it in at a depth of about 6 – 12 inches. If you already have plants such as rhubarb or fruit trees etc., just fork the matter around the plants. No need to dig it in. One of the first things you will notice is that your worm population increases. Worms are wonderful things for growers because they naturally aerate the soil. You should see a marked improvement in your harvest. So as soon as the ground thaws and you feel like a dig, make sure you dig in some goodness too!
0 Comments
 Jean Price - Plot 4
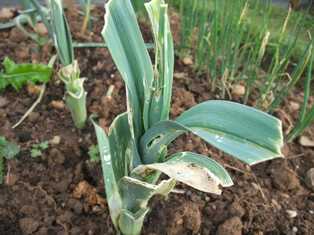
Did you have problems with your leeks this year? We did, and so did a lot of people that I have spoken to. Quite a few allotment sites in Trafford think that they have been affected by Leek Moth, for the very first time. Leek moth is mainly a problem in southern England but it is spreading north. Here is what the RHS have to say about it: Quick facts Common name Leek moth Plants affected Leek, onion, shallot, garlic Main symptoms White patches on leaves, with young plants rotting and dying. Small caterpillars may be seen in the plant tissues Caused by Caterpillars of a small moth Timing April-October What is leek moth? The adult leek moth is an inconspicuous very small (5-6mm) brown moth. Its larvae (caterpillars) feed on leeks and similar crops. Symptoms Damage from leek moth caterpillars appears as;
Control Non-chemical control The female moths can be prevented from laying eggs by covering susceptible plants with horticultural fleece, or an insect-proof mesh such as Ultra-Fine Enviromesh. Crop rotation should also be practiced to prevent potential build-up of moth populations under the fleece. Look for the white, net-like silk cocoons on the foliage and squash them. Chemical control None of the pesticides currently available to home gardeners for use on leeks and onions will give effective control of leek moth. Biology Leek moth has two generations during the summer with larvae damaging the plants;
When fully fed, the caterpillars are 11 mm long. They come out of the plant and pupate within net-like silk cocoons that are spun on the foliage. Adult moths emerge in autumn and overwinter in sheltered places. There is a much more detailed study here. leek-moth-project-kdunn.pdf  Sheila Taylor - Plot 30a
I really recommend making good use of the leaf mould. Firstly I used barrow loads of it as mulch for the raspberries, blackcurrant and gooseberry bushes. I had a load of manure delivered in February and put loads of it where the potatoes were going to be planted. It was only half a load, but as I have half a plot, there’s plenty for next year as well. I hardly ever dig, except when digging things up, so it just went on top of the soil. I just planted the potatoes underneath it. It was pretty fresh, but they didn’t seem to mind! Then more barrow loads of leaf mould went on top of the manure - loads - and all the work was left to the worms. I earth up the potatoes as they grow. Result - absolutely gorgeous soil, and the only digging was harvesting a really good crop of potatoes. Do use this free and useful resource. 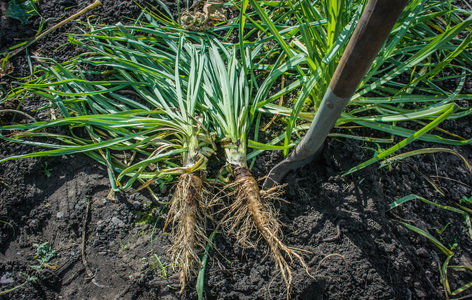 Paul Price - Plot 4
In the summer newsletter I told you about growing Salsify, also know as the Oyster Plant, a vegetable that we haven't grown before. Well this week we started to harvest it. It looks pretty strange with small roots growing from the main root, a bit like a hairy parsnip! The roots damage very easily so after a disaster with a fork, I used a spade to carefully lift them out of the ground. The problem is, if you damage them, they quickly lose their moisture and shrivel up. They are a bit of a faff to prepare (so Jean tells me) as they discolour very quickly once pealed so it's good to have a bowl of water with a little lemon juice in to plunge them into. Just quickly peel them with a potato peeler, trim the tops and bottoms and that's it. They will sit happily in the water until you are ready to cook them. The first ones we tried were roasted at 200C (gas 6) for twenty minutes in a little olive oil with a couple of crushed garlic cloves, similar to how you would roast parsnips. They were delicious! Neither of us care for parsnips as we find them too sweet, but we both loved these. Next time I will cook them in a little butter and wine to bring out the oyster taste. We will definitely be growing them again next year.
Paul - Plot 4
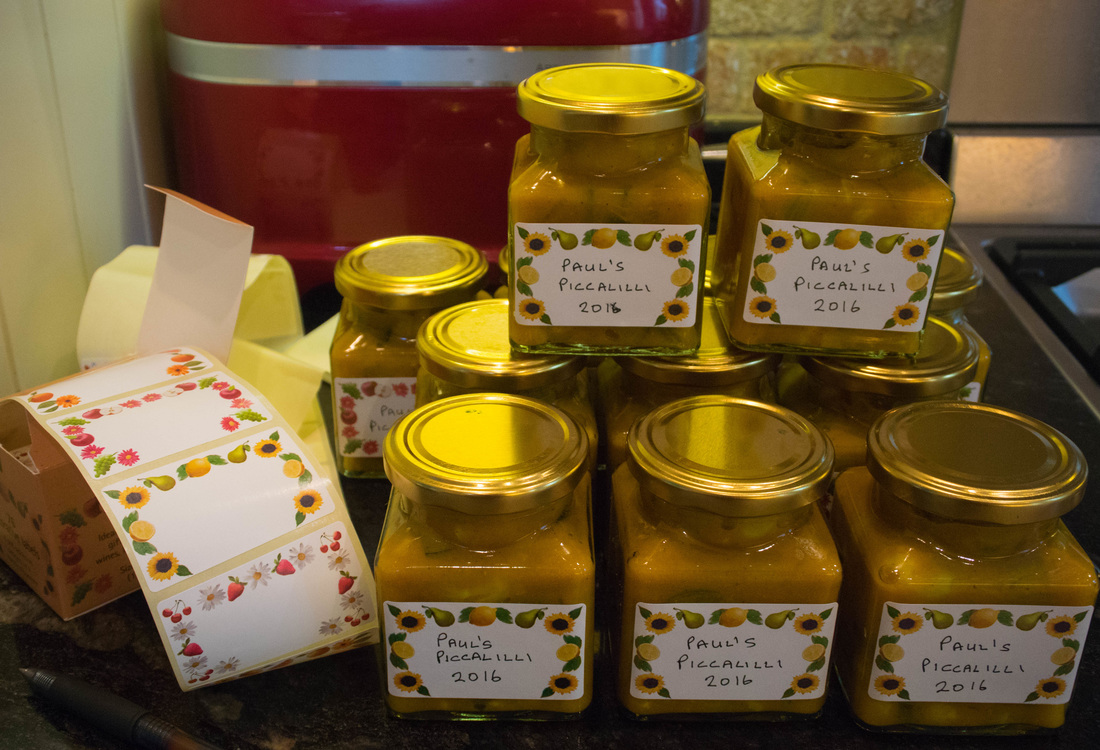
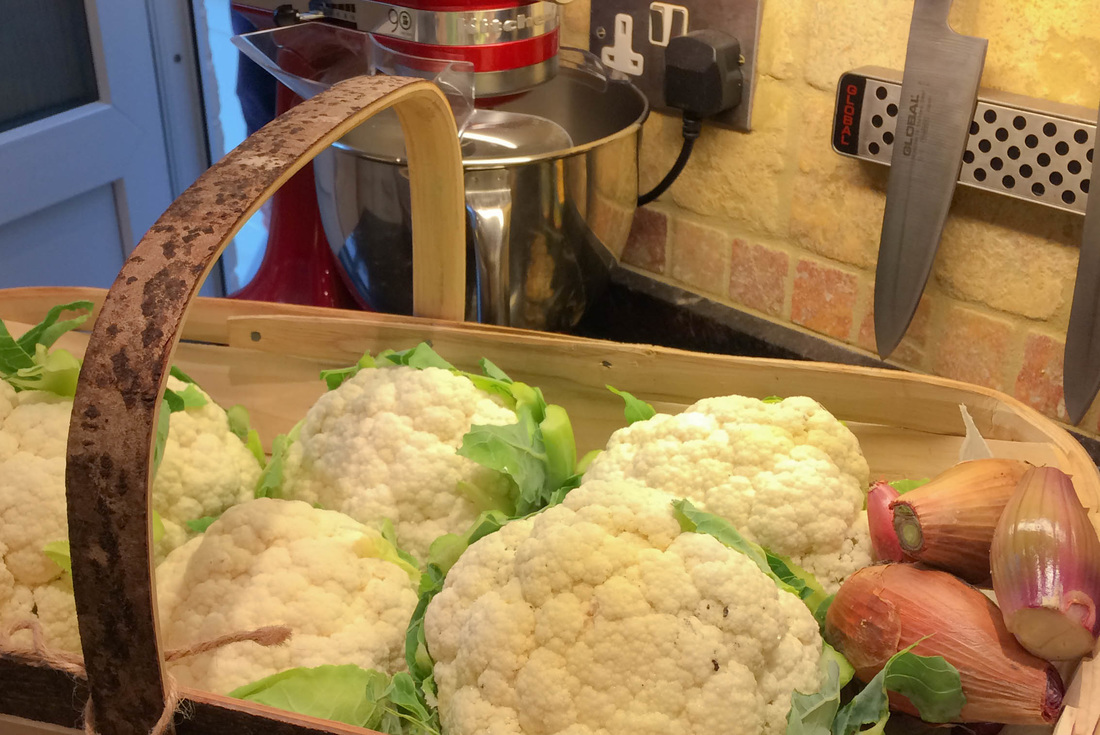
Well the weather today is just awful, with 3 more days of rain forecast. So, time to make use of all those surplus cauliflowers and shallots and get pickling! We love Piccalilli in the Price household so when we were in Padstow a couple of years ago we bought some from Rick Stein's shop. It was delicious and so we hunted down his recipe. You can find the recipe here: Paul's Piccalilli What better way to spend a rainy Friday than to make it. We prepared all the ingredients and soaked them in salt water yesterday so we were all ready to cook them and combine them into a vinegar and mustard concoction. The whole house smells of vinegar now but the result is 12 gleaming jars of golden goodness. They will have matured to their best in 2 - 3 months if we can wait that long. Just in time for our Bonfire BBQ. So look out for it and spread it on your barbecued sausages. Enjoy!
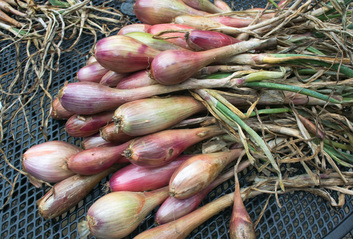
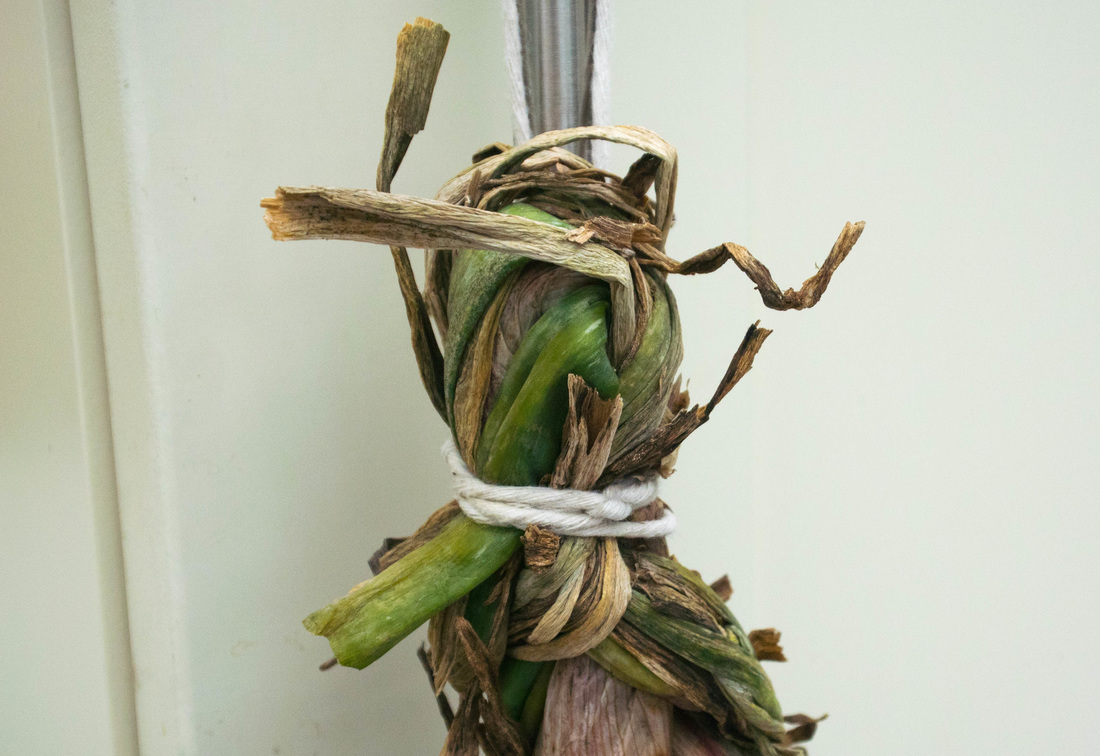
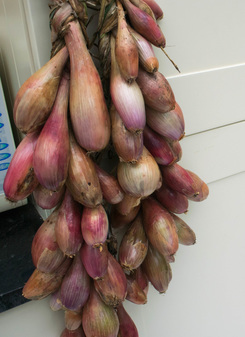
Jean - Plot 4 Well, I said I would give you an update to my shallot blog from April when my shallot plants looked like weedy spring onions. I planted them in bunches of 5 or 6, but I think next year I will limit the bunches to 4 as a few of them were crowded out. I am pretty pleased with the harvest though and they should last me right through the winter. A couple of weeks ago we harvested them and left them on the plot on an incline to let the juices flow out so that they would dry ready for storage. Today I brought them home for preparation. First I trimmed the roots and brushed away any dry skin from the bulbs. Then I plaited them ready for hanging. I plait them as you would hair, introducing a new shallot with each crossover. I also do this with my onions. The only thing to do then is to tie them firmly at the top with string ready to hang. I hang one bunch in the kitchen ready to use and the rest in a cool dry place. These will last right into next Spring.
Some people ask why I grow "banana" shallots as opposed to the little round ones. The answer is simple; I am a lazy cook who hates spending hours pealing the fiddly round ones. With the banana varieties pealing is easy. Just take off the top and bottom, make an incision right the way down the length of the shallot and peal back the skin. Shallots pealed in seconds. Happy days!! 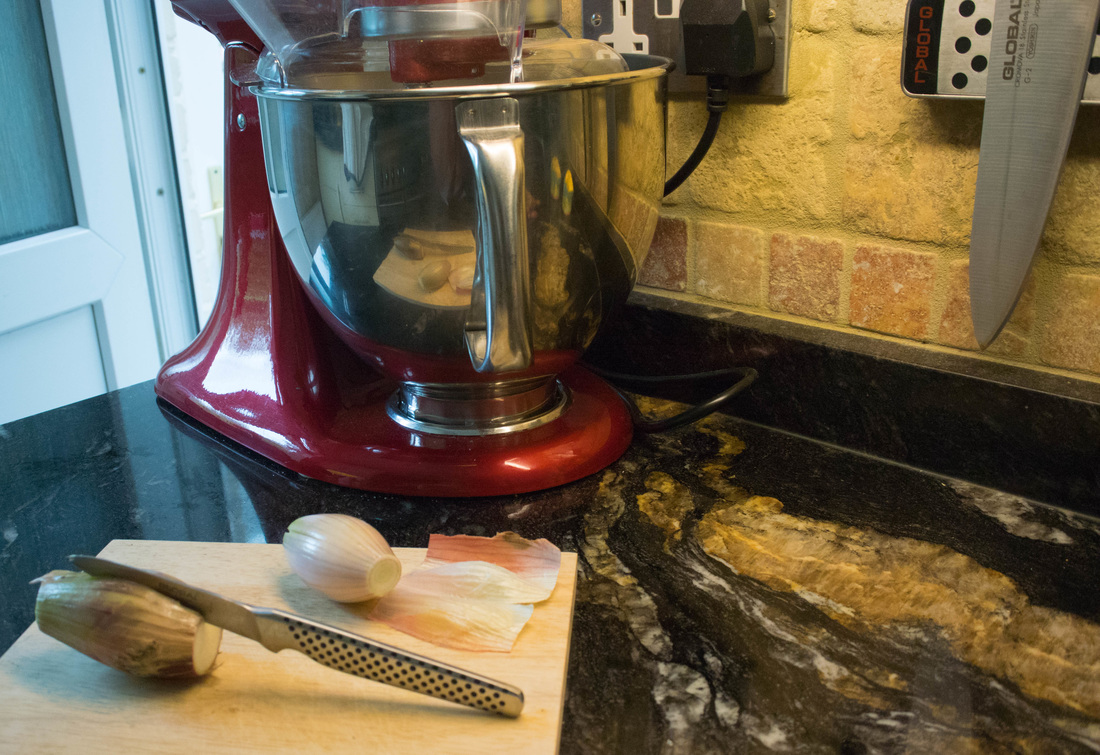 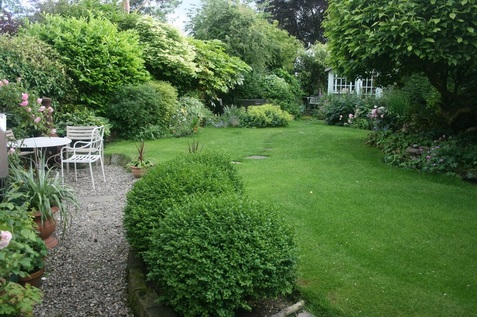 Anne Earnshaw - Plot 16a:
The Sale Arts Trail provides the opportunity to visit artists studios, quirky and unusual display spaces; gardens, shops and cafes all exhibiting and selling the work of professional artists and makers in the Trafford area. I have exhibited at the last two SAT’s, loved the experience and met such lovely people. I work in my garden through the seasons as always, as I find this relaxing and I can put my artistic touches in the garden using colour, shapes and textures etc. In my art studio I have been mark making, getting used to drawing and painting again as well as working on my photography work. My inspiration mainly comes from nature and the places I love to visit. I have just finished working on my annual project at Woodhey’s Primary School working with yr 4s teaching the children photography – my ‘Learning to See Programme’. This year I have been studying the landscape in the Lake District as this is one of my favourite places to find inspiration. I am putting together a body of work Inspired at Tarn Hows. My studio is at home at Carnforth Drive. It is Venue O on this year's Arts Trail. This year Catherine Mahe glass designer and Nicky Martins ceramics will be exhibiting at my house. I was first inspired by Ansel Adams when I started my photography work whilst studying, admiring his simple and beautiful compositions in nature. As a young child I worked in more detail, it was whilst at school and college I became more interested in the Impressionist’s and Abstract painters using paint more freely and seeing shapes and patterns. Besides working on my art I work at a well known retailers. When I can I love to play the piano, listen to classic FM and smooth FM, dancing and singing, reading a good book, gardening, our allotment and walking our dog Stanley at Dunham and Arley Hall. When my son was 5 years old and he is now 17 years, I decided to go back to college as a mature student and studied Art Foundation at South Trafford College and studied at Salford University, Visual Arts BA (hons) . When I was a student I was studying fine art painting and then photography became my main medium. I still like to draw and paint when I can. You can see this influence in my Photography sometimes and my work can look like a painting.  Jean - Plot 4: Quite a few of you have stopped me when you have seen me using my oscillating hoe so I thought I would share some details about it with you. I have used this hoe for a couple of months now. I bought it from www.quickcrop.co.uk for £34.50 and it's quite simply the best thing I have bought in ages. The head has a double sided blade and moves backwards and forwards as you hoe, meaning that you get both a forward and backward motion when you are hoeing. It cuts deep too which means it get all of the small weeds and cuts deep into the big ones. It is really controllable so you can get close to your crops without damaging them. But the best part is how quick you can hoe your whole plot. The very long handle makes it easy to use without too much effort so what I normally do is that when I have finished for the day, I get out this hoe and go over the whole plot (and we have a full plot) in minutes. So I can keep the weeds at bay with very little work on my part. Simples:-) Quickcrop is a great website by the way for some good tips so I will put a link to it on the Links page. They even send you a little bag of sweets with your order! They should pay me commission for this blog:-) I found this little video on their site which I am sharing below. If you have any equipment or tips that you would like others to know about, email me and I will share your blog on this page.
Jeff - Plot 19:
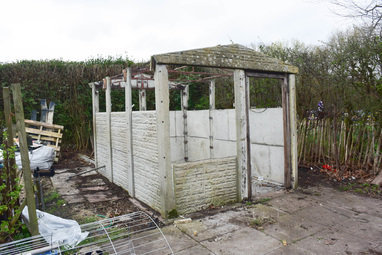
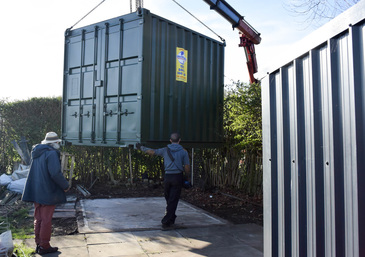
Well, it's the end of an era for the grotty garage which used to stand at the bottom of the allotment. It has been there longer than anyone can remember. We have people on the allotment that have been here nearly 40 years and it was there when they arrived so I am guessing that it was about 50 years old. It all happened pretty fast, and those of you who know me well, know I don't often do fast:-) This is how it happened: At the end of March we had a call from Trafford Council to say that they had found some money in the budget to demolish the garage. It had an asbestos roof and the walls were crumbling and so it had to go. The thing was, it had to happen before their financial year end which was the beginning of April so we had no time to lose. We arranged for the demolition people to take away the garage pretty quickly and then had to move fast with the replacement because we had the contents of the garage stored all over the place. I managed to locate a container and had it painted green. We knew that we would have to have it delivered via the cemetery as they could not get it in any other way. So, the tricky part was to coordinate with the container and cemetery people because obviously, we could not have it delivered when there were funerals going on. Thankfully we managed to get a day that suited everyone and the container was delivered without any drama. It was lifted over the cemetery hedge with a crane and dropped into place. Then the poor driver realised that he couldn't get out of the bottom gates and had to back up all the way to Marslands Road. It was quite a feat as the track is quite narrow. All the contents are now back in the new storeroom and I hope you agree that it looks far smarter than the prefab garage did.
Jean - Plot 4:
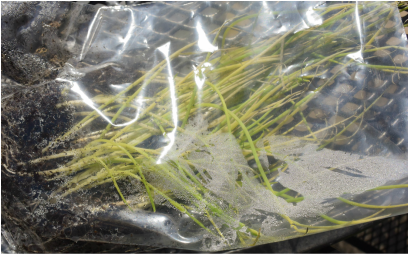
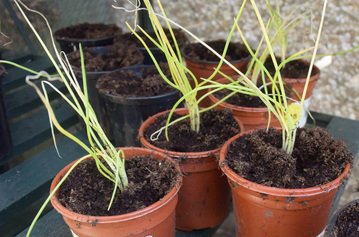
Our shallots were fabulous last year and it all happened by accident. We put our order in with Marshall's for a couple of packs of Roderique Shallots, thinking that they were shallot sets, but in fact they were shallot plants. We were pretty surprised when they arrived to see that they looked more like lots of spring onions rather than shallot sets but we decided to give them a go. We are so pleased that we did as they turned out to be the best shallots we have ever grown. They are banana shallots, so called because they are long rather than round. I prefer these as they are very easy to peel, unlike their round cousins. Unlike their cousins, you don't plant them singly and then harvest a bunch; you plant them as a bunch and harvest that bunch. Anyhow, we were so please with the results that we decided to grow them again and I thought I would share their progress with you. We got the delivery a couple of days ago and the photo on the left shows how they look when they arrive. The first thing is to separate them up into clumps of 4 - 6, which isn't difficult as they are more or less delivered like that. I try to get clumps of 5 as I think that it is a good number to grow. The next step is to pot the bunches up into 3 - 4" pots as you can see in the right hand picture. I did that today and I will let them settle in the greenhouse for a week before hardening them off and planting them on the allotment. I really hope that we get the same result as last year as they were fabulous. I plaited them up and they lasted right through the winter. I will let you know how we go on with them in a later blog. Wish me luck:-) |

|
Walton Wanderings Blogspot |

Copyright - Walton Road Allotment Society © 2023